
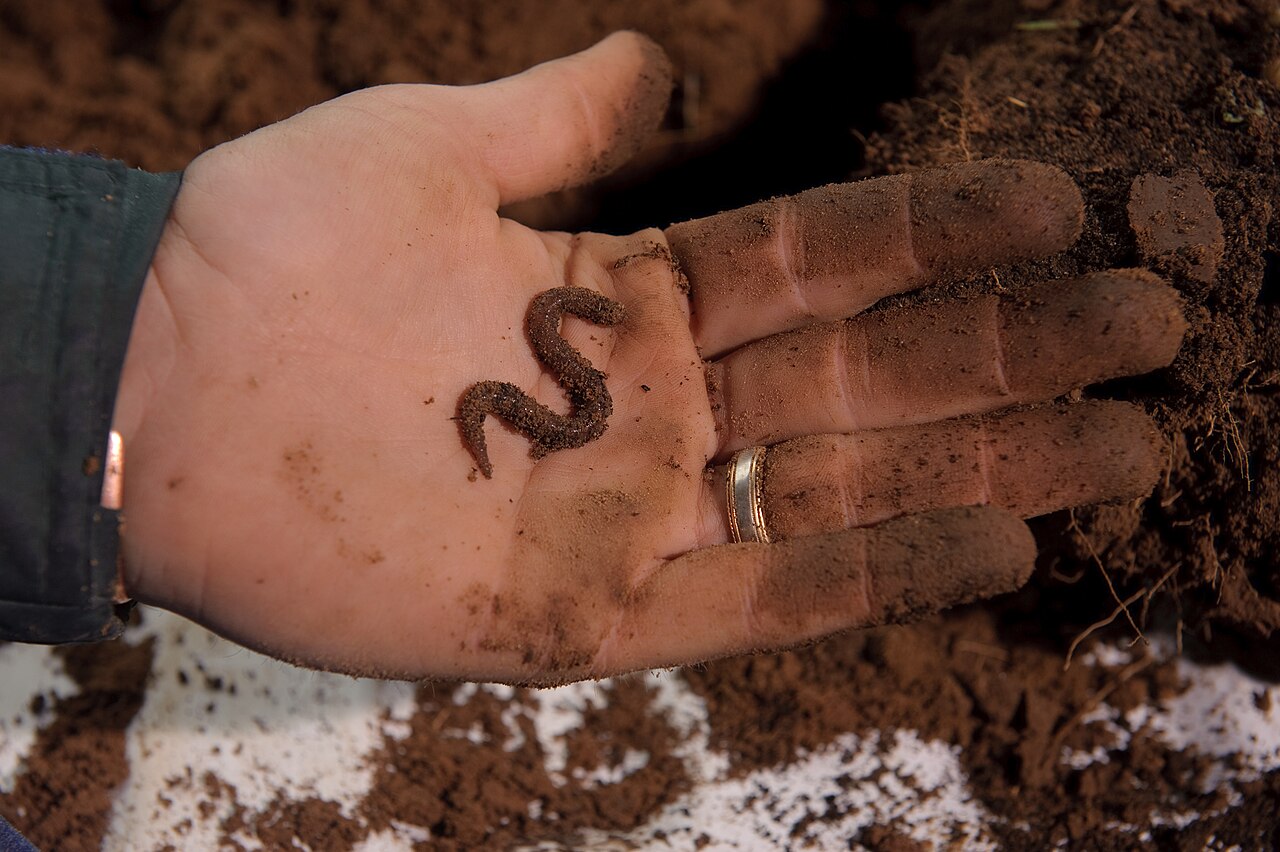
No yard needed. A plastic tub, some shredded paper and a pound of red wigglers can turn your kitchen scraps into rich plant food, right in your apartment.
In brief
- Red wiggler worms eat kitchen scraps in a small indoor bin, no yard, turning or heat required.
- A bin needs nested plastic tubs with screened ventilation holes, moist shredded paper bedding and a pound of red wigglers.
- Feed worms chopped fruit and vegetable scraps in small amounts, and keep out meat, dairy, oil and pet waste.
- Red wigglers do best around 55 to 77 degrees Fahrenheit and can die as temperatures approach 90 degrees.
- Finished castings take up to six months and can be harvested by luring worms to fresh bedding on one side of the bin.
Worm composting, or vermicomposting, lets you recycle food scraps without a yard, a pile or a pitchfork. Food scraps make up about 20 percent of landfill materials by weight in the United States, and food that decomposes in a landfill produces methane, a greenhouse gas roughly 20 times more potent than carbon dioxide at trapping heat. A worm bin fits under a sink or in a closet and turns peels and coffee grounds into rich plant food.
Why vermicomposting works indoors
Unlike a backyard pile, a worm bin is a cold composting process. Microbes and worms break down the material without generating noticeable heat, so there is nothing hot, smoky or smelly to manage. It also asks less of you than a traditional pile: you never turn it, because the worms do the mixing.
The trade-off is speed. A well-run hot compost pile can finish in about six to eight weeks under optimum conditions, while a worm bin can take up to six months to produce finished compost. In exchange, you get a process that works in a small space, and the finished compost can carry up to 4 percent more nitrogen than conventional hot composting. It also does not destroy weed seeds, though with kitchen scraps that is rarely an issue.
The key to indoor success is choosing the right worms. Red wigglers, Eisenia fetida, are the standard choice. They are surface dwellers that thrive in leaf litter and other organic matter rather than in soil, they tolerate crowding, and they reproduce quickly in a confined space. Deep-burrowing garden worms and night crawlers need different habitat and are poor substitutes.
What you need
A basic setup uses inexpensive, easy-to-find items:
- Two plastic bins. One taller tub nests inside a shorter one. EPA suggests a top tub of about 18 gallons, roughly 15 inches deep and 20 inches wide, and a bottom bin around 15 inches deep, 25 inches wide and 5 inches high. The shorter bin needs no lid; the extra length gives you room to scoop out the liquid, sometimes called worm tea, that collects below.
- Screening material. Window screen works, but avoid metal, which rusts in the damp bin. You only need four scraps about 4 inches by 4 inches.
- Shredded paper. Enough to fill the bin three inches deep, plus extra for each weekly feeding. Almost any paper works, but skip heavy, shiny or colored paper.
- A little soil. About a pound, free of harmful chemicals.
- Water. To moisten the paper and soil.
- Red wiggler worms. One pound, roughly 1,000 worms, is a common starting amount. Worm growers sell them online, and some garden centers and pet stores carry them. You can also get them from another worm bin owner.
- A trowel and a small kitchen container for collecting scraps.
For the countertop pail, our guide to choosing a kitchen compost bin covers what to look for.
Step 1: Prepare the bin
Drill or poke holes in the lid, around the sides about an inch from the top rim, and along the bottom for drainage. Holes about one-eighth of an inch wide, spaced an inch or two apart, let in plenty of oxygen while staying too small for worms to squeeze through.
Cover the holes with your screen scraps from the inside. Without screening, the worms may escape. Then nest the drilled tub inside the shorter bottom bin so liquid can drain down and collect where you can scoop it out.
Step 2: Build the bedding
Bedding regulates the bin’s air and moisture, and it is where most new bins go wrong. Soak your shredded paper, then drain it well. Spread four to six inches of moistened bedding in the bin, mixed with a little plain soil. The bedding should be damp but not dripping: squeeze a handful and you might see a drop or two.
Paper alone can mat down and cut off airflow, so fluff it as you go and mix in torn corrugated cardboard or dry leaves for structure. Loose bedding creates the pore space worms and microbes need to breathe.
Try this: Set the bin up a week before the worms arrive. Giving the bedding time to soften and grow a microbial community makes the bin far more hospitable on day one.
Step 3: Add the worms
Scatter the worms on the bedding surface and give them 10 to 15 minutes to dig down on their own. Cover the surface with a few whole sheets of damp newspaper or paper towels to keep it dark and moist.
Watch for invasive species such as the Asian Jumping Worm, sometimes sold as the Alabama Jumper or Georgia Jumper. Stick with red wigglers from a reputable seller or a known bin owner.
Where you put the bin matters as much as what goes in it. Keep it indoors, out of direct sun, and away from radiators, oven vents and freezing spaces. Red wigglers do best around 55 to 77 degrees Fahrenheit and can die as temperatures approach 90 degrees. Check the bedding itself, which may differ from the room around it.
Step 4: Feed them slowly
A new bin cannot process what an established one can, so start small. Add a modest serving of chopped produce, tuck it beneath the bedding in one corner, and wait until most of it disappears before feeding again in a different spot. The worm population and its microbial community grow over time.
On the menu: vegetable scraps, modest amounts of fruit, coffee grounds and crushed eggshells. Melons, pumpkins and squash break down fast and disappear quickly, but their water content means you should add dry bedding alongside them. Limit salty food, spicy sauces, and large amounts of citrus, onion or garlic. Never add meat, dairy, oils, pet waste or plastic to the bin.
Freezing scraps before they go in does double duty: it softens plant tissue and cuts the odds that fruit fly eggs hitch a ride into the bin.
Troubleshooting common problems
Most worm bin trouble traces back to moisture, feeding rate or airflow. Small corrections usually solve it.
| Problem | Likely cause | Fix |
|---|---|---|
| Rotten smell | Overfeeding or soggy bedding | Stop feeding, fluff the bin, mix in dry shredded paper or cardboard |
| Fruit flies | Exposed food or fly eggs on scraps | Bury food fully under bedding, freeze scraps first, add a dry paper layer on top |
| Worms at the lid | Uncomfortable conditions | Check moisture and temperature, make sure bedding is moist but not wet |
Coffee grounds are a favorite, but they can dry a bin out, so check moisture if you add a lot. When the surface turns slick and waterlogged, top it with dry paper.
Step 5: Harvest the castings
Finished vermicompost looks dark and fine, and in a home bin it normally includes some decomposed bedding. Expect to wait up to six months for your first harvest.
The gentlest method is migration. Push the finished material to one side of the bin and put fresh bedding and food on the other. Within weeks, many worms will shift toward the new food, so you can remove the older material a little at a time. Pick out stray worms and cocoons as you go.
A faster option uses light. Direct light drives worms downward: set small mounds under a bright lamp and scrape off the top in layers as they burrow away.
Using castings on houseplants
Worm castings deliver nutrients to plants, including nitrogen, phosphorus, potassium, calcium and magnesium, along with beneficial bacteria, fungi and protozoa. Compost also helps soil absorb and hold water and release nutrients slowly. Mix a handful into potting soil or work it into the top inch of a pot, and use the worm tea from the bottom bin to water your plants. There is no single correct dose, so start light and watch how your plants respond.
A worm bin pairs naturally with producing less scrap in the first place. Our guide to wasting less food at home covers storage, date labels and meal planning, and if you ever move to a place with a yard, our backyard composting basics explain how a traditional pile handles the scraps and trimmings a worm bin cannot.
Reader questions
Do worm bins smell bad?
A healthy worm bin smells earthy, not rotten. Odors usually mean the bin is overfed, too wet or short on air, which fresh dry bedding and a feeding pause can fix.
How many worms do I need to start?
A pound of red wigglers is a common starting amount, roughly 1,000 worms. Smaller starter populations also work, since worms reproduce in a well-kept bin.
Can I use regular earthworms from the garden?
No. Garden worms are deep burrowers and do poorly in a bin. Red wigglers live near the surface in rich organic material and tolerate crowding, which is what a bin requires.
Where should I keep the bin?
Indoors, out of direct sun, and away from radiators, oven vents and freezing spaces. A closet, under the sink or a basement shelf all work if the temperature stays reasonable.
This article is general information, not financial, legal or tax advice. Programs, incentives and rules change, so check current details with official sources and qualified professionals before you decide.